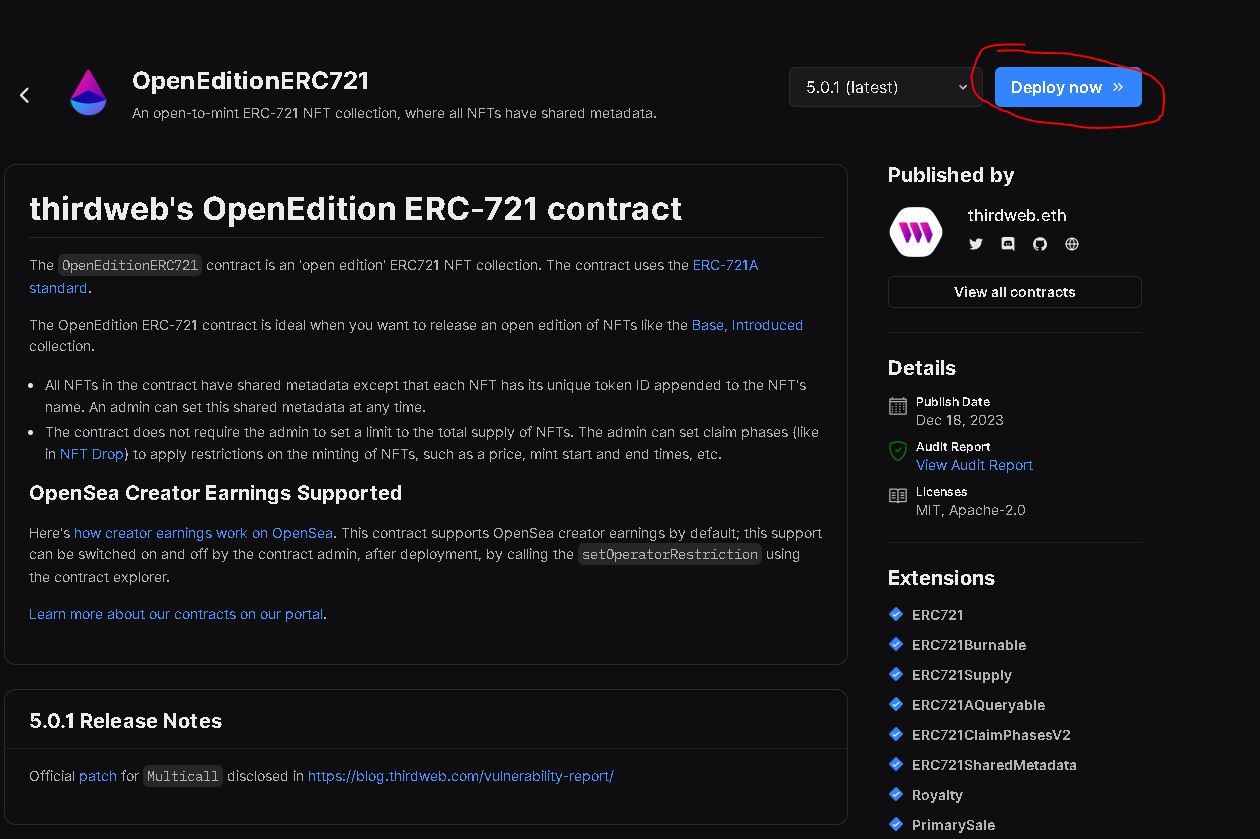
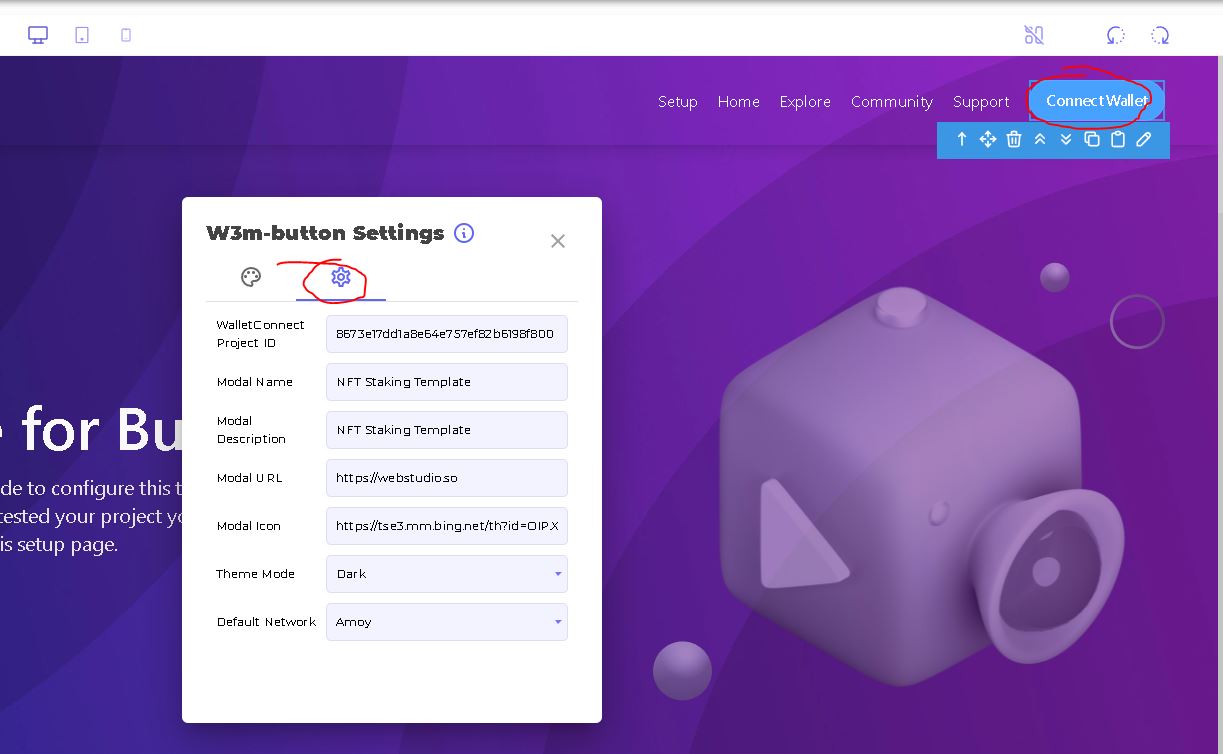
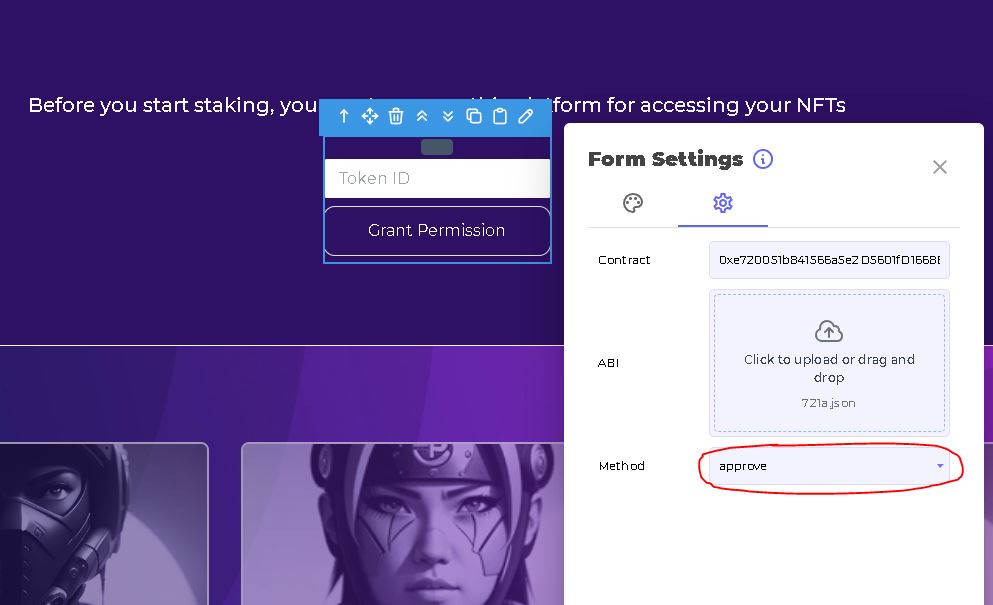
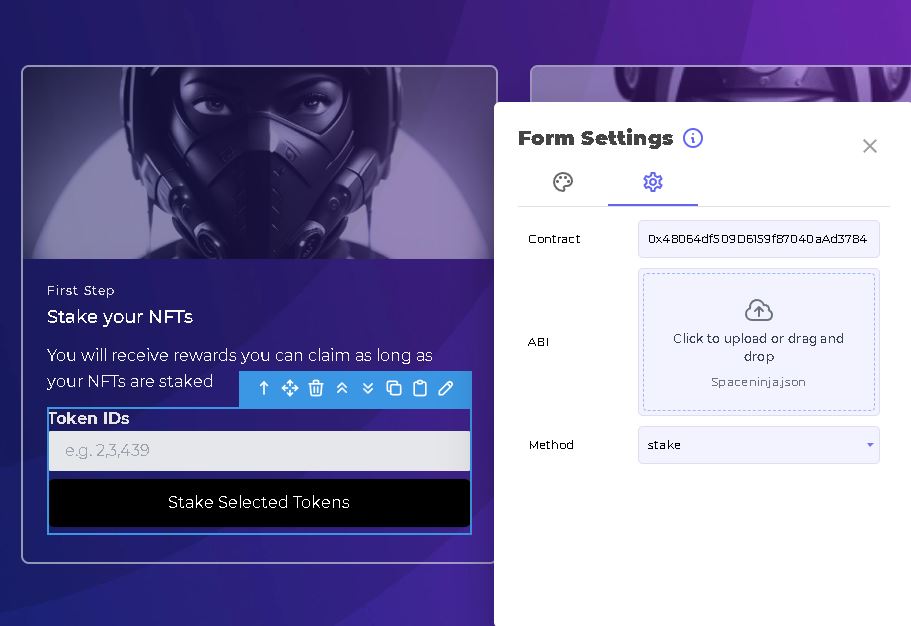
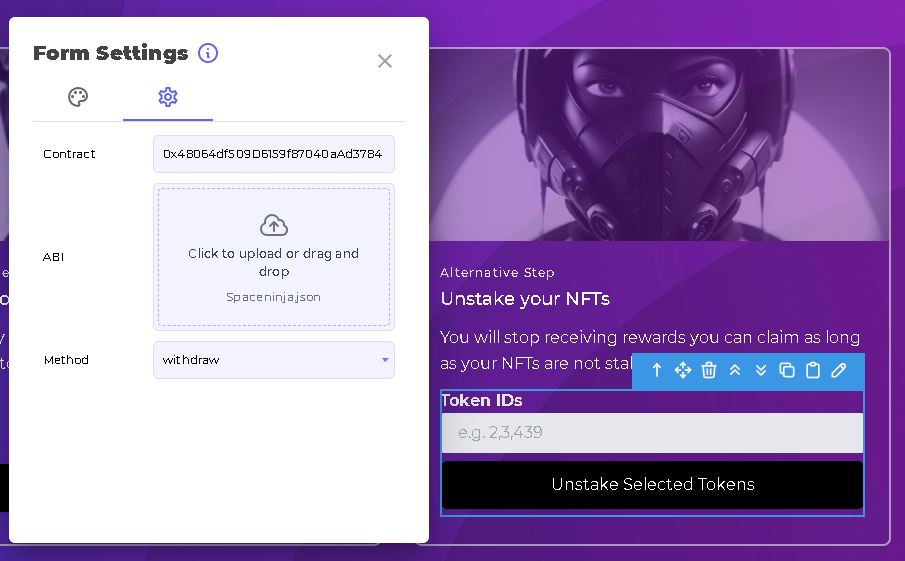
Setup Guide for Builders

As a Webstudio builder follow this guide to configure this template for your users. Once you have succesfully configured, deployed and tested your project you can delete this guide as part of your pages and any link in the project to this setup page.

hero

PREREQUISITES

Smart Contracts

Thirdweb is a platform that provides developer with low code tools for building Web3 projects. They also offer verified, no-code smart contracts you can launch for NFTs, Tokens, Staking, Marketplaces. For this project we will be using three of their smart contracts. Please follow the link below and deploy each of these contracts over the same network. As good practice you can assemble the project on a testnet first and then re-configure the contract address to production when ready.

OpenEditionERC721

ERC721A standard NFT that will be staked into the platform.

Learn More

TokenERC20

ERC20 standard token used to reward users who stake their NFTs.

Learn More

StakeERC721

Staking contract that will allow users to stake their NFT in exchange for ERC20 rewards.

Learn More

THIRDWEB

1. Deploy NFT Contract

Navigate to thirdweb and launch your NFT contract. You can use any ERC721A compatible contract with this template.

Contract 0xe720051b841566a5e2D5601fD1668E0D581e2EB6

1

Deploy NFT Contract

Create, configure and deploy OpenEditionERC721 (or any other 721A compatible) NFT contract to the selected network. 

Navigate

2

Setup Claim Conditions

Before your NFTs can be minted you must specify under which conditions can be minted, for our project we create a new "public" claim phase but any phase will work out.

3

Mint NFTs

Make sure you distribute your NFTs. If you wish to use Webstudio you will have to create a new project for minting or adding minting functionalities on this one (this is not covered in this tutorial).

step

THIRDWEB

2. Deploy Token Reward Contract

Navigate to thirdweb and launch your ERC20 contract. You can use any ERC20 compatible contract with this template.

Contract 0xF8ba11b6413905F162a9ae46E77752ECF9885845

1

Deploy Token Rewards Contract

Create, configure and deploy Token (or any other ERC20 compatible) Token contract to the same network as the previous steps.

Navigate

2

Mint Tokens

Mint any set of tokens to your wallet. You will use these later to transfer to the staking platform for rewards.

step

THIRDWEB

3. Deploy Staking Contract

Navigate to thirdweb and launch your Staking contract. You can use any ERC721A compatible contract with this template.

Contract 0x3F930318A21e2eb465AB833007940Ea82A048725

1

Deploy StakeERC721 Contract

Create, configure and deploy StakeERC721 contract. When prompted you will select the Staking Token Address from the smart contract address deployed in previous step 1 and the Reward Token Address from the smart contract address of previous step 2.

Navigate

2

Add Transfer Permissions

In the permission tab of this contract in thirdweb make sure the address where you minted tokens from the previous step 2 is added in the list of allowed transfers.

3

Deposit Reward Tokens

In the thirdweb dashboard of your contract navigate to Explorer tab and find the depositRewardsToken function. Input the amount of tokens you want to transfer and the native token value equivalent. Click execute. After this, our staking contract will have reward tokens to distribute to users staking NFTs.

step

WEBSTUDIO

4. Setup Connect Wallet Button

On your Webstudio project, click on edit the Web3 wallet button on the top right corner and configure it. You can find more information in the Webstudio Docs Page.

1

Configure WalletConnect Project

Navigate to https://cloud.walletconnect.com/app and create your own Application, then configure in Webstudio with the obtained projectId.

Webstudio Docs Page

2

Select Network

Select the network where the previous 3 contracts are based on.

3

Style

Select between light and dark mode and text and logo displayed during login and signature of transactions.

step

WEBSTUDIO

5. Setup Approval Workflow

Before your users can stake they must give permission to the staking platform for managing the NFTs. This can be done granularly, where people specify a tokenId and "approve".

1

Edit the "Grant Permission" Action Form

Navigate to the button Grant Permission and click on the "up arrow" in the blue menu bar until you navigate to the form (it will contain the button and the gray input squares) then click edit to open edition modal. Once there you will replace the contract from the NFT contract (step 1), leave everything else as is.

Webstudio Docs Page

2

Edit the Atribute For Staking Contract

Navigate to the first input (small gray rectangle) and edit it. On the properties tab replace the "Value" with the Staking Smart Contract address from step 3.

step

WEBSTUDIO

6. Setup Staking

Configure the action form to enable users staking their NFT after approval.

1

Edit the "Stake" Action Form

Navigate to the button "Stake Selected Tokens" and click on the "up arrow" in the blue menu bar until you navigate to the form (it will contain the button and the gray input squares) then click edit to open edition modal. Once there you will replace the contract from the Staking contract (step 3), leave everything else as is.

Webstudio Docs Page

2

Style

To change the button text open the edit modal and navigate to properties and change it from there.

step

WEBSTUDIO

7. Setup Unstaking

Configure the action form to enable users unstaking their NFT after submission.

1

Edit the "Unstake" Action Form

Navigate to the button "Unstake Selected Tokens" and click on the "up arrow" in the blue menu bar until you navigate to the form (it will contain the button and the gray input squares) then click edit to open edition modal. Once there you will replace the contract from the Staking contract (step 3), leave everything else as is.

Webstudio Docs Page

2

Style

To change the button text open the edit modal and navigate to properties and change it from there.

step

WEBSTUDIO

7. Setup Claim

Configure the action form to enable users claiming rewards.

1

Edit the "Claim" Action Form

Navigate to the button "Claim Rewards" and click on the "up arrow" in the blue menu bar until you navigate to the form (it will contain the button and the gray input squares) then click edit to open edition modal. Once there you will replace the contract from the Staking contract (step 3), leave everything else as is.

Webstudio Docs Page

2

Style

To change the button text open the edit modal and navigate to properties and change it from there.

step

WEBSTUDIO

7. Setup Claim CTA

Configure the action form to enable users claiming rewards from Call to Action.

1

Edit the "Claim" Action Form

Navigate to the button "Claim Rewards" and click on the "up arrow" in the blue menu bar until you navigate to the form (it will contain the button and the immediate upper container) then click edit to open edition modal. Once there you will replace the contract from the Staking contract (step 3), leave everything else as is.

Webstudio Docs Page

2

Style

To change the button text open the edit modal and navigate to properties and change it from there.

step

WEBSTUDIO

8. Publish your Project!!!

You are ready to go!